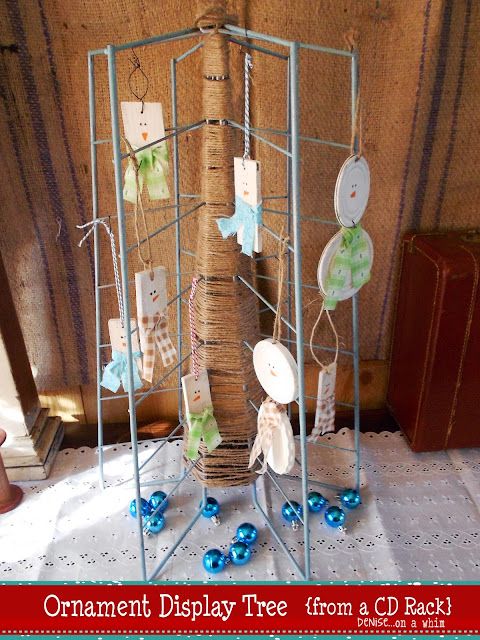
After crafting some simple snowman ornaments out of 2x4 pieces and can lids, I needed a clever place to display them at our booth. A metal CD rack I picked up at the thrift store was just the ticket!
Believe it or not, I picked up this piece of junk at a thrift store for $2, not knowing the first clue about what I was going to use it for! I began to doubt myself after it sat in my house for a month or two and I still had no ideas what to do! But when the need for a quick ornament display came up, this junky old cd rack sure did come in handy!
As you see it in the picture above, what was once the cd holder is now upside-down. There was a larger round lazy-susan on the bottom that each wire piece was attached to. The smaller black circle is still holding the pieces together, but it's now hidden under twine. each metal piece was upright originally. But, after removing the lazy-susan, we tilted each piece so that it would form a tree-ish shape, attaching the pieces together at the top with wire. Then came the hard (or time-consuming anyway) part...
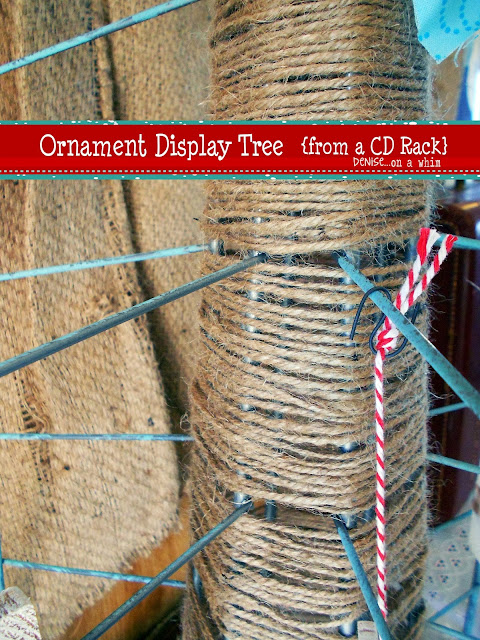
I started at the bottom and, armed with my trusty hot glue gun, I began attaching twine, wrapping around and through each metal rung. I added hot glue as I went and only used 3' or so pieces of twine at a time, starting fresh with a new piece after I ran out. The rungs weren't spaced far enough apart to fit my entire ball of twine through in order to wrap it and I knew if I cut a piece too long, I'd end up with a mess of twine knots!
So, after 3 or so cups of coffee and a morning of fighting my cat about a ball of twine, I finally got the entire tree wrapped. I'm happy with it. I really like how the twine accentuates the tree shape in the middle.
I grabbed a paintbrush and threw some Destin Gulf green on the metal. I just wanted to give it a touch of color because I wasn't thrilled with the bare metal after I added the twine. And I figured a touch of green (even if it is more turquoise than green) would give it a more, dare I say, realistic tree appearance. What could be more realistic than a turquoise tree made of out metal and twine, right? :)
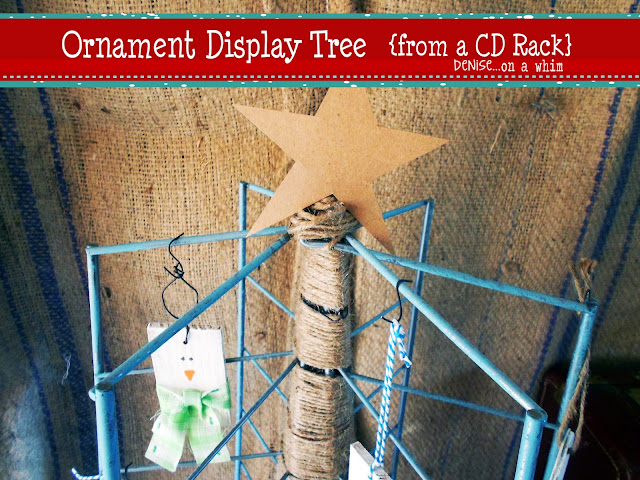
To top it off, and to cover up the slightly odd shape at the top where all of the pieces came together, I added a star cut out of brown kraft cardstock.
Head on over and like our facebook page here.
Believe it or not, I picked up this piece of junk at a thrift store for $2, not knowing the first clue about what I was going to use it for! I began to doubt myself after it sat in my house for a month or two and I still had no ideas what to do! But when the need for a quick ornament display came up, this junky old cd rack sure did come in handy!
As you see it in the picture above, what was once the cd holder is now upside-down. There was a larger round lazy-susan on the bottom that each wire piece was attached to. The smaller black circle is still holding the pieces together, but it's now hidden under twine. each metal piece was upright originally. But, after removing the lazy-susan, we tilted each piece so that it would form a tree-ish shape, attaching the pieces together at the top with wire. Then came the hard (or time-consuming anyway) part...
I started at the bottom and, armed with my trusty hot glue gun, I began attaching twine, wrapping around and through each metal rung. I added hot glue as I went and only used 3' or so pieces of twine at a time, starting fresh with a new piece after I ran out. The rungs weren't spaced far enough apart to fit my entire ball of twine through in order to wrap it and I knew if I cut a piece too long, I'd end up with a mess of twine knots!
So, after 3 or so cups of coffee and a morning of fighting my cat about a ball of twine, I finally got the entire tree wrapped. I'm happy with it. I really like how the twine accentuates the tree shape in the middle.
I grabbed a paintbrush and threw some Destin Gulf green on the metal. I just wanted to give it a touch of color because I wasn't thrilled with the bare metal after I added the twine. And I figured a touch of green (even if it is more turquoise than green) would give it a more, dare I say, realistic tree appearance. What could be more realistic than a turquoise tree made of out metal and twine, right? :)
To top it off, and to cover up the slightly odd shape at the top where all of the pieces came together, I added a star cut out of brown kraft cardstock.
And there you have it... an industrial-faux-shabby-repurposed-Christmas kind of tree!
It works very well for displaying our ornaments and fits right in at our booth full of upcycled goods!
Stop back next week to see another great snowman project. (Yes. I really love snowmen!)Head on over and like our facebook page here.
Follow me on Pinterest with this link.
To get all the latest posts through bloglovin', just click this.
New followers and comments absolutely make my day! :)
'Til next time!
'Til next time!


No comments:
Post a Comment
I love hearing from you and read all of your comments. They make my day! I'm sorry I can't reply to every one of them, but I sure do love reading them and appreciate every one!