Sick of looking at the stack of berry containers
that have been sitting in my garage for a few years,
I finally decided to do something with them!
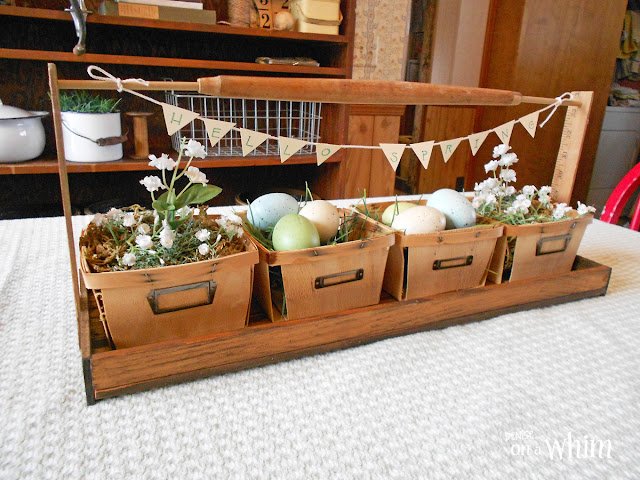
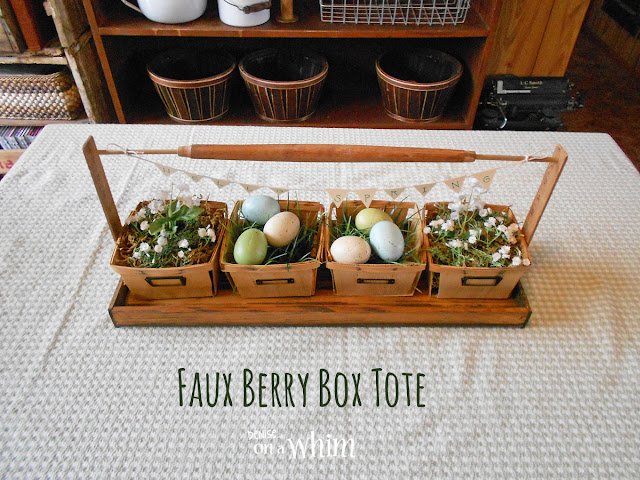
This vintage-inspired berry basket tote is what I came up with.
Before I go on and on about my project, let me tell you
that you'll be seeing a lot more wonderful spring ideas at the end of this post!
I'm part of a spring blog hop today that you're absolutely going to love!
Make sure to check out all the links when you're done looking at my project.
You might need to set aside a couple hours (or maybe the whole day)
so grab a cup of coffee (pr the whole pot) and enjoy!
Before you go galavanting off to see everyone else's
awesome spring diy projects, crafts and home decor,
let's talk a little more about my berry tote.
I got the idea for my faux berry basket tote when I saw the cutest vintage version online.
I have never seen one at an antique store around here
and probably couldn't afford the price tag if I did.
So I decided to make my own!
Here is what the berry basket started as.
It was part of a desk organizer that I really haven't used in years
except to stuff things in that I didn't need in the first place.
Sometimes I honestly do think I'm a hoarder.
I removed the screws from the organizer and left only the bottom piece of wood.Because I wanted it much darker, I sanded it down first.
After that, I cut a few furring strips the length and width of the bottom board.
I cut the end pieces with an extra 1/4" so they would be long enough
for the side pieces of furring strip to butt up against.
To attach the sides to the bottom, I simply used wood glue with clamps on the bare wood,
attaching the long sides to the bottom of the tote first.
After the long sides were dried and secure, I added the short sides.
Then I stained the box with a dark walnut.
Of course, every tote needs a handle.
That's where I got stuck for awhile.
What did I have in my stash of junk that would work for a handle?
Thank goodness I had picked up a couple of rulers at a thrift store a week before!
Because I think they look wonderful as part of the handle!
I cut them to the height I wanted the handle to be.
Then I got stuck again.
Happens a lot really, but I don't always tell you about those moments!
I like to at least appear to have it together sometimes. :)
Turning back to my pile of junk, I found an old dowel from a chair or something.
I liked the idea of it as the handle, but it wasn't long enough.
So I grabbed a skinnier dowel that I had picked up at Menards.
Measuring what I would need for the skinnier dowel to glue into the larger dowel
and the ends of the ruler, I got my hacksaw out and made a few cuts.
I drilled holes in each end of the larger dowel and used
wood glue to secure my smaller dowel pieces into the drilled holes.
I also drilled holes into the tops of each ruler piece for the ends of the handle to attach to.
After gluing, and allowing to dry overnight, the ruler pieces to the box,
I added on the handle.
For this I used Loctite glue.
If I were to do it over again, I would have made my handle just a touch larger
and secured it differently to the ruler pieces.
But so far, so good!
I added label holders to the front of each basket with Loctite glue again.
I love the look of label holders on just about anything!
Filling the berry baskets was fun.
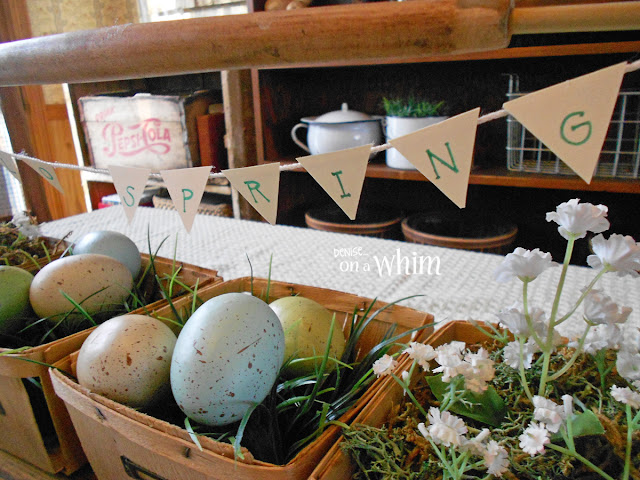
I had these speckled eggs from last year and knew they should be part of my spring centerpiece.
I put some fake grass in 2 of the baskets and sat the eggs on top of it.
I filled the other 2 baskets with floral moss,
adding a bit of reindeer moss on the top of each for more green.
After adding a few small, white buds into the moss,
my berry baskets looked nice and springy!
I tied a small pennant banner made from a manilla folder, stencils and twine on the handle.

This project is a threefold win for me.
Not only did I gain a pretty new centerpiece,
I got the look of a vintage berry basket tote at virtually no cost to me
AND I shortened that stack of berry boxes in my garage by a bit, too!
Always feels good to get rid of some of my junk pile!
Now stick around to see all the other spring decor inspiration!
Are you ready to do some blog hopping?
I sure hope so because you don't want to miss seeing a thing!
Welcome to the DIY My Spring Home and Garden Blog Hop.
The blog hop is brought to you by Hometalk.
Make sure you check me out on Hometalk
and then explore all the home and garden ideas out there right at your fingertips!
And you can check out all the projects on your favorite social media sites,
including Hometalk, using the hashtag #DIYMySpring!
Your comments make me smile :) 'Til next time!


No comments:
Post a Comment
I love hearing from you and read all of your comments. They make my day! I'm sorry I can't reply to every one of them, but I sure do love reading them and appreciate every one!