Showing posts with label rusty. Show all posts
Showing posts with label rusty. Show all posts
Thursday, October 15, 2015
Friday, September 12, 2014
Tuesday, February 25, 2014
Tuesday, December 24, 2013
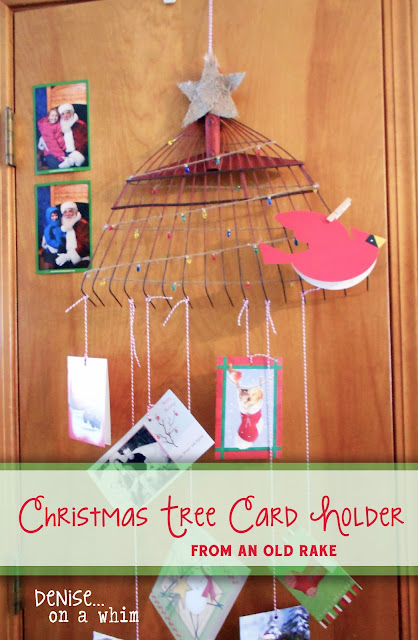
Christmas Tree Card Holder from an Old Rake
Christmas Eve greetings to you all! And, speaking of greetings, I'm going to share just one more Christmas project with you all before the big day! I've always wanted a good place to put my Christmas cards and now I finally have one. An old rake turned Christmas tree is the perfect spot for hanging my greeting cards!
Monday, August 19, 2013
Industrial Cabinet Goodness!
Some of my favorite decor pieces are industrial. I just love the look of metal and wood together in perfect harmony. And, if you ask me, we don't do nearly enough of them! But I'm sharing one with you today that I hope you like!
Labels:
Aubusson Blue,
cabinet,
chalk paint,
decor,
drawers,
duck egg,
Emerald Isle Green,
hardware,
industrial,
junk,
metal,
repurposed,
rusty,
stained,
upcycled,
wood
Lowell, Mich
Lowell Township, MI 49331, USA
Friday, May 3, 2013
We Hit the Motherload!
We have really accumulated a lot of stuff this week! Oh my indeed! My garage is absolutely filled to capacity (and I still have to add another dresser! lol).
Just look at the stuff we found/bought on the cheap/received this week...
First up, is this old barn pulley.
And this fabulous vintage trunk.
Both traded for something Eric had. No cost. :)
Then there's this child's desk and hutch.
And coordinating mirror.
All 3 were curbside pick ups!
And we have this old boy.
With his matching mirror.
Alas, this one is not ours.
But we get to redo it for its owner nonetheless! :)
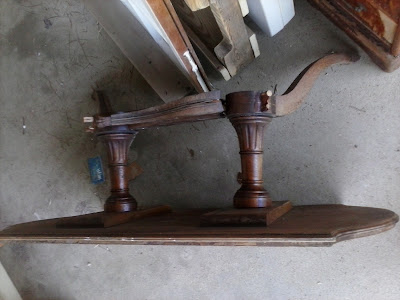
I found this poor thing on the side of the road.
She's feeling rather poorly.
But the top has a beautiful shape
(perfect as a sign/hookboard/shelving unit/whatever!)
And just look at her legs!
I know we will use these pieces for something amazing!
And last, but not least, the big score!
We have a friend who sets up the rummage sale at her church.
Wouldn't you know it... we got in on the presale!
9 gorgeous pieces.
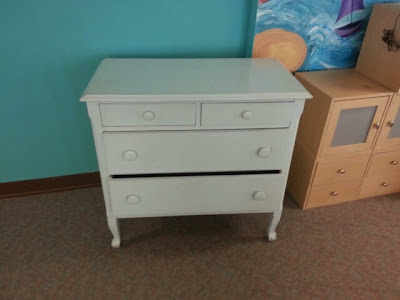
Plus this white dresser that hasn't made it to my house yet.
See how lovely these chairs are?
2 of them match. 2 of them don't.
But they all have beautiful detail!
And check out this little lady!
Must be some kind of sewing storage unit.
See the cute little drawer cubby in there?
So sweet!
And all 10 pieces for just $112!
See? I told you...
We hit the Motherload!
Hooray!
Hope you all have a great weekend.
I have a feeling I'm going to be very {very!} busy! lol
Friday, March 8, 2013
Antique Handle Caddy
I will be the first to admit that I shamelessly stole this idea from Donna at Funky Junk Interiors. I saw it shortly after I signed up for Pinterest and fell in love.
So last summer I began the search for an antique drill, at a very reasonable price. They are pretty easy to find, but I knew I didn't want to pay much. So... I waited. And then, I happened upon this antique hand brace during the last few hours of a barn/estate sale right outside of town. For only $2.00. Now that's my kind of price tag! :) It still has what looks like a screwdriver bit in it.
I immediately told Eric what I wanted him to do with it. It was not on the top of his priority list, apparently, because it just got done about a month ago. But that's ok, because it did indeed get done! He is a man of his word, even if he is slow!
Just teasing, Eric! {love ya}
I have no idea how he put it together. I didn't even bother to ask, because I was way too excited! But Donna gives an excellent tutorial on her blog at the link above.
The timing actually couldn't have been more perfect. Right after he finished the caddy, I received my new shipment of Ce Ce Caldwell's sample size paints. And I was just itching to try them out. I picked the Traverse City Cherry because I've seen some nice things done with it and I don't usually lean towards red. But, boy, am I glad I did!
I painted the entire thing in red (it's a very beautiful red, by the way!) and then did a splotchy (that's the technical term, right?) topcoat of Virginia Chestnut. Then I distressed it and used dark aging wax over the whole thing.
I think it looks a lot like barnwood.
And I LOVE it!
Hope you enjoy it too :)
Everyone loves a good party!
Check my project out along with other great inspiration, at these great blogs...
Check my project out along with other great inspiration, at these great blogs...
Masterpiece Monday at Boogieboard Cottage, Mop It Up Monday at I Should Be Mopping the Floor, Make the Scene Monday at Alderberry Hill, Pink Hippo Party at Pinkapotamus, Monday No Rules Blog Hop at A Sorta Fairytale,Just Something I Whipped Up at The Girl Creative, Metamorphisis Monday at Between Naps on the Porch, Making the World Cuter Monday, Before and After at Thrifty Decor Chick (first Monday of the month), What's in the Gunny Sack at the Gunny Sack, Make It Pretty Monday at The Dedicated House, Mod Mix Monday at Mod Vintage Life, Budget Decorating Party at Creative Cain Cabin, That DIY Party at DIY Showoff
One Project at a Time at A Bowl Full of Lemons, Transformation Tuesday at The Ironstone Nest, Monday Funday at Creatively Living, Nifty Thrifty Tuesday at Coastal Charm, The Scoop at Cedar Hill Ranch, Project Inspired{d}at Cupcakes and Crinoline, You're Gonna Love It at Kathe with an E, Transformed Tuesdays at PJH Designs, Tweak It Tuesday at Cozy Little House, Take a Look Tuesday at Sugar Bee Crafts, Primp Your Stuff Wednesday at Primp Junktion, Be Inspired at Elizabeth and Co, Pretty Things Link Party at twelveOeight, Time to Shine at A Diamond in the Stuff, Too Cute Tuesday at Funky Polkadot Giraffe, The Power of Paint Party at Domestically Speaking, Creatively Tuesday at The Rustic Pig, Show Me What You Got at Not Just a Housewife, Share It Link Party at The Winthrop Chronicles, Tasteful Tuesday at Naptime Creations, Tutorial Tuesday at Hope Studios, Trash 2 Treasure at Kammy's Korner
Wildly Original Link Party at I Gotta Create, Wow Us Wednesday at Family Home and Life, Whatever Goes Wednesday at Someday Crafts, Whimsy Wednesday at Smart School House, What's It Wednesday at Ivy and Elephants, Wednesday Whatsits at White Lights on Wednesday, What We Accomplished Wednesday at Green Willow Pond, Under $100 Linky Party at Beyond the Picket Fence, Show and Share at Southern Lovely, Wow Us Wednesdays at Savvy Southern Style, Wow Me Wednesday at Gingersnap Crafts, From Dream to Reality at The DIY Dreamer, Its' a Party! at A Creative Princess, Show Off Your Stuff Party at Fireflies and Jellybeans, Look What I Made Wednesday at Creations by Kara
Party Time at The 36th Avenue, Home Sweet Home at The Charm of Home, Transformation Thursday at The Shabby Creek Cottage, Share Your Cup Party at Have a Daily Cup of Mrs. Olson, Hookin' Up with HOH at House of Hepworths, Talkin' about Thursday at Designed Decor, Live Laugh Linky at Live Laugh Rowe, Home and Garden Thursday at A Delightsome Life, The Inspiration Gallery at Craftberry Bush, Made U Look Linky at Made in a Day, Creative Things Thursday at The Vintage Farmhouse, Catch as Catch Can at My Repurposed Life, Time Travel Thursday at The Brambleberry Cottage, Catch a Glimpse Party at A Glimpse Inside, 52 Mantels, Creative Inspirations Linky Party at Embracing Change, Tickled Pink at 504 Main
Simply Creations Link Party at My Simple Homelife, Furniture Feature Friday at Miss Mustard Seed, Inspire Me Please Link Party at Liz Marie Blog, Frugal Friday at The Shabby Nest, Feathered Nest Friday at French Country Cottage, What Have You Redone at Redoux Interiors, Home Sweet Home at The Charm of Home, Thrifty Things Friday at The Thrifty Groove, Simple and Sweet Fridays at Rooted inThyme, Be Inspired at Common Ground, Faunt It Friday at Chic on a Shoestring Decorating, Frugalicious Friday at Finding Fabulous, Fabulously Creative Friday at Jennifer Rizzo, Show and Tell Friday at Romantic Home, Junkin' Joe Vintage and Thrifty Finds at The Cottage Market, Weekend Wrap-Up Party at Tatertots and Jello, Shabbilicious Friday Link Party at Shabby Art Boutique
Saturday Show and Tell at Cheerios and Lattes, Saturday Nite Special at Funky Junk Interiors, A Bouquet of Talent Party at Life on Lakeshore Drive, Strut Your Stuff Party at Six Sisters' Stuff, Show and Tell Saturday at Sassy little Lady, Get Schooled Satuday at Too Much Time on My Hands, Power of Pinterest Party at Fox Hollow Cottage, Your Great Idea Party at Or So She Says, Overflowing with Creativity Party at It's Overflowing
The Sunday Showcase Party at Under the Table and Dreaming, Sunny Simple Sundays Party at Sunny Simple Life, Sundae Scoop at I Heart Naptime, Think Pink Sundays at Flamingo Toes, Nifty Thrifty Sunday at Nifty Thrifty Things, It's Party Time at Three Mango Seeds, Restyled Sundays at Stylish Once Again
Thursday, January 24, 2013
Salvaged Cabinet Door Chalkboard
I found this great old cabinet door at an antique show that I happened to have the good fortune of driving by one day. It was a great show at the Lake Odessa Fairgrounds. Tons of vendors and awesome stuff. But I picked this up from a young kid who salvages items and resells them as he is putting himself through college. He had some great architectural pieces!
Just check out the rusty old hardware on this thing...
And this great weathering too!
It was easy to create a chalkboard for this piece. It already had the groove to slide a board into so all I needed to do was use some chalkboard paint and slide it right in there! Easy as pie and perfectly awesome. I'm sure it's looking fantastic on its new owner's wall. :)
By the way, check out this piece that I also bought from the same kid. All I did was paint some crackly teal on it and add a hook. Some pieces are just so full of vintage charm that they don't need much work at all!
Labels:
antique,
aqua,
chalk paint,
chalkboard,
decor,
frame,
hardware,
hook,
junk,
patina,
recycled,
repurposed,
Repurposing,
rusty,
teal,
thrift,
upcycled,
weathered,
wood
Monday, January 21, 2013
Heavy Metal Love
I wanted to share with you one of my very favorite projects. For this past Christmas, I decided to try my hand at some metal stamping. I borrowed the stamps. I picked up a couple of washers and machine keys of some sort. (I think that's what they were called anyway! I'm not really very proficient in hardware lingo. I try to leave the actual building portion of our business to Eric!) I had planned on stamping something and maybe making a keychain or a little trinket for Eric as a Christmas present. But, the truth is, I wasn't altogether sure yet just what I was going to do.
So, I brought everything home and kept staring at it, contemplating what exactly I was going to make out of this miscellaneous stuff I had purchased. With the way I had sat them on the table, it occurred to me that the 2 machine keys I had bought looked like an L when put together and the washer, of course, was an O. And then the idea came to me... to spell out the word love with various metal pieces and make a sculpture of some sort.
I had to go back to the hardware store, of course, and spend about 30 minutes just pulling out drawers and perusing the various pieces they had available. But I managed to find 3 more pieces to use as the V and E. Sort of, anyway. The E was going to take just a little bit of work... But, at least I had what I needed.
Next I got on the phone/email/facebook and asked a few people about soldering the pieces together. Turns out, you can't solder different metals together. Okay. What do I know anyway? :) I was told to try an epoxy. So I went out and bought me some JB Weld. And I got a friend to cut the D-Ring so it would look like an E. Now I was in business...
I finally got the stamps out and began with that task. Easier said than done! I messed up one of the letters, (but managed to hide it under my V, so it was all good). This was a Christmas present and not a product I was going to sell, so I wasn't overly worried about that oopsy. Another of my letters got all crooked and goofy but, like I said, I knew Eric wasn't going to be overly critical so I let it stand. I painted the stainless steel hinge-thingy I had bought for the V with some Annie Sloan Chalk Paint™ so that it wouldn't be quite so shiny. Then I got out my rusty old base, mixed some epoxy together, and started adhering metal. It worked like a charm! And I love the way it turned out. I think Eric does too, which is what really counts after all! :)
Hope you enjoyed reading about my little metal masterpiece. By the way, I'm calling this project Heavy Metal Love in honor of it's recipient, Eric, and his love for heavy metal music. Just seemed appropriate! :)
I'm sharing this fun project at...
Beyond the Picket Fence Favorite Things Party
Love It Linky Party at Liza Marie Blog
Beyond the Picket Fence Favorite Things Party
Love It Linky Party at Liza Marie Blog
Labels:
aqua,
art,
decor,
epoxy,
industrial,
junk,
love,
metal,
metal stamping,
recycled,
repurposed,
Repurposing,
rusty,
upcycled,
valentine
Subscribe to:
Posts (Atom)


