Showing posts with label thrift. Show all posts

Thursday, April 28, 2016

Distressed Vintage Style Bread Box

Distressed Vintage Style Bread Box | Denise on a Whim
Oh my goodness, have I been busy!
I've been preparing for an upcoming show and, let's just say, it's resulted in a frenzied attempt to make as much as possible! I'm sure everyone out there who does craft shows can relate!
But today I'm returning to finally show you another one of my kitchen updates. This thrift store bread box got a quick update with paint and lettering and it so fun in my kitchen!

Wednesday, March 2, 2016

Vintage and Thrifted Plant Containers

Thrifted Basket Spring Planter | Denise on a Whim
I recently decided to go a little greener in my house.
I added a few plants, both real and fake, here and there.
The little basket above is one spot.
A few pots from the dollar store and a wooden basket
makes a nice little springtime display.

Thursday, February 11, 2016

Thrift Store Vase Makeover and DIY Flowering Twigs

Thrift Store Vase Makeover and DIY Twig Flowers | Denise on a Whim
It's easy to turn something old and unwanted into something beautiful again.
In this case, all it took was a little paint and a little stain
to transform a discarded wooden thrift store vase
into a lovely piece of decor for my living room.

Wednesday, August 13, 2014

Wooden Bowl Display

A thrifted and salvaged wall organizer for the bathroom via http://deniseonawhim.blogspot.com
I'm always picking up various odds and ends at the thrift store. One corner of my house is actually overrun by all the junk I find. I figured I'd better start using some of it or I might as well just call myself a hoarder and be done with it! This project used only one little piece from my stash, a wooden bowl. But hey, at least it's a start!

Tuesday, January 28, 2014

Valentine Vases with Repurposed Sweaters

Sweater and Heart Vase Upcycle via http://deniseonawhim.blogspot.com
If you're anything like me, you have a boatload of clear glass vases sitting in a cupboard somewhere in your house. Mine are in the cupboard above my refrigerator. The cupboard I can't reach unless I get a chair to stand on. I have about 10 vases and only two that I ever really pull out and use. So I figured I would find a way to pretty up those vases and put them to good use!

Monday, August 12, 2013

Finally Buying a Few Pieces for Me!


I finally did it! I bought something for me to keep. I normally see things that I like and want for myself but pass them up to buy goodies I can use for our business. But not this time!

Friday, May 17, 2013

I Guess We Make Lots of LOVE Stuff :)

I love aqua. For anything. I think this sign would look awfully cute displayed with red! I love me some teal and red!

This was just another vintage frame we purchased from an auction. With a little cleaning and a light coat of aqua paint, the details on this beauty just pop!
I usually end of taking the glass right out of the frames for most of our projects but, for this one, I decided to keep it. We simply glued some black and grey floral fabric on the backer and inserted it behind the glass. The only thing left to do was cut a white vinyl stencil and apply it to the top of the glass.

We think she turned out quite lovely! How about you...?


I would love it if you'd connect with me via bloglovin'facebookgoogle+pinterest, or hometalk!
Getting new followers and comments absolutely makes my day! :)

Tuesday, May 7, 2013

A Little Project for Me!

It's pretty rare that I actually work on a project meant for me. We're usually too busy trying to prepare for a show. And now, with the addition of our permanent booth at Caledonia Vintage Marketplace, things will probably only get worse. Let's hope business is that good anyway. :)

But a few weeks ago, I decided to get a print made of a photo I'd had taken of the kids and I about a year ago. I hate to say I'd waited that long to get prints made, but it's true. Sometimes things just get crazy and you forget little things like that.

But I figured it was high-time to replace another picture I had in my house so I got this one printed too. Of course, when I got home, I didn't have a frame to put it in. When it comes to my own frames, I always gravitate toward nice, chocolate brown tones. But, I figured I might as well put some of my painting skills to good use. So I grabbed a thrift store frame. It was shiny silver. Not my taste at all. But, no fear. I had my Ce Ce Caldwells' paints on hand! 
I painted a nice coat of Virginia Chestnut on the frame and let it dry. Then I added Santa Fe Turquoise over the brown, brushing up and down, left and right, making sure to deliberately let the brush strokes show. I love how the brown peeks out from under the strokes and in the details on the frame. 
The colors were a great match for the photo itself. With the filter on it, the picture definitely has a nice vintage feel and the color of my shirt and eye shadow coordinate so nicely with the chalk paint colors I chose.
I couldn't be happier with how it turned out.
And ugly silver frame would never do, but now it is a focal point for one corner of my living room. :)

Friday, May 3, 2013

We Hit the Motherload!

We have really accumulated a lot of stuff this week! Oh my indeed! My garage is absolutely filled to capacity (and I still have to add another dresser! lol).
Just look at the stuff we found/bought on the cheap/received this week...

First up, is this old barn pulley.
 And this fabulous vintage trunk.
Both traded for something Eric had. No cost. :)

Then there's this child's desk and hutch. 

 And coordinating mirror.
All 3 were curbside pick ups!

And we have this old boy.
 With his matching mirror.
Alas, this one is not ours.
But we get to redo it for its owner nonetheless! :)

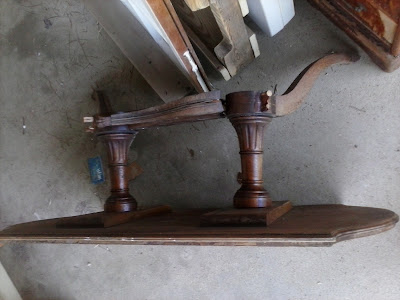
I found this poor thing on the side of the road.
She's feeling rather poorly.
But the top has a beautiful shape
(perfect as a sign/hookboard/shelving unit/whatever!)
And just look at her legs!
I know we will use these pieces for something amazing!  

And last, but not least, the big score!
 We have a friend who sets up the rummage sale at her church.
Wouldn't you know it... we got in on the presale!
9 gorgeous pieces.
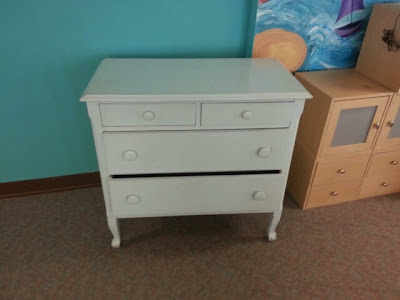
Plus this white dresser that hasn't made it to my house yet.
 See how lovely these chairs are?
2 of them match. 2 of them don't.
But they all have beautiful detail!
 And check out this little lady!
Must be some kind of sewing storage unit.
See the cute little drawer cubby in there?
So sweet!
 And all 10 pieces for just $112!

See? I told you...
We hit the Motherload!
Hooray!

Hope you all have a great weekend.
I have a feeling I'm going to be very {very!} busy! lol

Tuesday, March 26, 2013

A Chalkboard in Bloom

Today I wanted to tell you a little bit more about our spring chalkboard that was hanging next to our new mail holder made from a shutter that I shared yesterday. 

This little goodie was already a chalkboard. But, the surface was pretty much shot. You just couldn't write on it anymore.

We had this particular item donated to us by a woman who saw us at our very first show and loved our stuff. She just so happened to have a few things in her car that she was planning on taking to Goodwill that day. Instead, she brought them back to our booth and made a donation to On A Whim! 
People can be so nice :)
All I did for this piece was paint the chalkboard itself with Ce Ce Caldwell's Emerald Isle and then I used Annie Sloan Aubusson Blue on the frame and dry brushed some Ce Ce's Santa Fe Turquoise over that. I love the effect! 

I printed some letters off of my computer and cut around them. I then cut 3" x 3" squares out of some springy-green scrapbook paper I had and made them into triangles. I glued the letters onto those and I attached the flags to a piece of teal yarn I had picked up somewhere in a free bin with some blue flower brads I had laying around in my scrapbook stash.
I just love the combination of blue and green, don't you? :)

Monday, March 25, 2013

1 Shutter, 2 Ways!

I'm so excited to show off our shutters today!

We picked this pair of shutters up last summer at my favorite barn sale near Nashville, MI. 
 And they've been sitting in my garage ever since...
 Guess I just needed the right inspiration for them.
I think Spring was exactly what I needed to get my mind working on what to make out of them. 
(Or at least the thought of spring, since it's still only in the teens here today!)
 For one, Eric made a pocket and attached it to the front. It's now a super cute mail holder. :)

I painted it with Ce Ce Caldwell's Johnston Daffodil and Santa Fe Turquoise. A little dry brushing, distressing and some wax (along with a few painted hooks for keys), and she's all set for Spring!
 I added a few wire flowers for extra cuteness :)

And this is the 2nd shutter...
 She's now a shabby shelf.
 Eric simply cut a pallet board for the top. I found the little brackets at a local store here called Flat River Cottage. I painted everything in Cottonwood Sienna and then roughly brushed on Johnston Daffodil over that and  added some clear wax. 

Then I, (yes I), attached all the pieces together and, voila!
A small shelf  just perfect for brightening up a wall!
 I made the rest of these little lovelies to go with it. I'll tell you more about those later this week. 
Now I can enjoy the impending spring (it will indeed come eventually, right?) inside my house, despite the weather! 


Next up... some spring cleaning! lol

If you like the crafty little decor displayed with our shutters, you should check out these posts too...
A Chalkboard in Bloom
Make a Wish (wall hook)
A Crafty Spring Bouquet
And on Friday you can learn how to make pretty wire flowers!
See how pretty they are on a piece of picket fence!

Partying here...
Spring Fling Linky Party with Flamingo Toes and Homework
Spring and Easter Categorically Crafting Show at Someday Crafts
Marvelous Mondays at Top This by Leanne


One Project at a Time at A Bowl Full of LemonsTransformation Tuesday at The Ironstone NestMonday Funday at Creatively LivingNifty Thrifty Tuesday at Coastal CharmThe Scoop at Cedar Hill RanchProject Inspired{d}at Cupcakes and CrinolineYou're Gonna Love It at Kathe with an ETransformed Tuesdays at PJH DesignsTweak It Tuesday at Cozy Little HouseTake a Look Tuesday at Sugar Bee CraftsPrimp Your Stuff Wednesday at Primp JunktionBe Inspired at Elizabeth and CoPretty Things Link Party at twelveOeightTime to Shine at A Diamond in the StuffToo Cute Tuesday at Funky Polkadot GiraffeThe Power of Paint Party at Domestically SpeakingCreatively Tuesday at The Rustic PigShow Me What You Got at Not Just a HousewifeShare It Link Party at The Winthrop ChroniclesTasteful Tuesday at Naptime CreationsTutorial Tuesday at Hope StudiosTrash 2 Treasure at Kammy's KornerFluster's Creative Muster Party at Fluster BusterThe Creative Spark at Clean and ScentsibleTuesdays at Our Home Party at Our Home Away from Home

Simply Creations Link Party at My Simple HomelifeFurniture Feature Friday at Miss Mustard SeedInspire Me Please Link Party at Liz Marie BlogFrugal Friday at The Shabby NestFeathered Nest Friday at French Country CottageWhat Have You Redone at Redoux InteriorsHome Sweet Home at The Charm of HomeThrifty Things Friday at The Thrifty GrooveSimple and Sweet Fridays at Rooted inThymeBe Inspired at Common GroundFaunt It Friday at Chic on a Shoestring DecoratingFrugalicious Friday at Finding FabulousFabulously Creative Friday at Jennifer RizzoShow and Tell Friday at Romantic HomeJunkin' Joe Vintage and Thrifty Finds at The Cottage MarketWeekend Wrap-Up Party at Tatertots and JelloShabbilicious Friday Link Party at Shabby Art BoutiqueTickled Pink at 504 MainAnything Blue Friday at The Dedicated House

Wednesday, March 20, 2013

Faded Denim End Table Redo

This is our latest furniture makeover. I'm calling it Faded Denim because that's what the colors and dry-brushing effect reminds me of... a comfy pair of blue jeans. :)

I picked up this little beauty at our local thrift store for only $6. It was originally $12 but I just so happened to be there on 1/2 price day. Lucky me!

Here is the table before any paint. The table was very sturdy, but I did sand the tops down because there were various scratches and dents in them and I thought a complete sand-down of those areas would be good for this project. 
And here she is after a coat of both colors. 
I used Smokey Mountain, which is the lighter color,  and Aubusson Blue. Smokey Mountain is a Ce Ce Caldewell's greyish-blue color that I really liked against the Aubusson.
I had originally decided to paint this with Old White and Smokey Mountain. This was my first time using Smokey Mountain, though, and once I got it on, I couldn't help but change my mind about the Old White and use Aubusson instead. It's one of my favorite colors and I knew I would love these 2 together! 
I painted Aubusson under the Smokey Mountain and vice-versa on some areas. I also dry brushed the Smokey over the Aubusson. I really like how that turned out.  
I had intended on using Aubusson in the grooves only. But I decided to paint the entire insets on the top, around the backs of the legs and the underside of the table too. 

(Pay no attention to the upside down no. 5 in the background there. The kids' bookcase is over that way!)
I distressed some of the Smokey Mountain off to reveal the Aubusson and then added more distressing all over to let the wood show through a bit. 
I think she'll make a very nice vintage side table for someone's home. :)

Everyone loves a good party!
Check my project out along with other great inspiration, at these great blogs...

One Project at a Time at A Bowl Full of LemonsTransformation Tuesday at The Ironstone NestMonday Funday at Creatively LivingNifty Thrifty Tuesday at Coastal CharmThe Scoop at Cedar Hill RanchProject Inspired{d}at Cupcakes and CrinolineYou're Gonna Love It at Kathe with an ETransformed Tuesdays at PJH DesignsTweak It Tuesday at Cozy Little HouseTake a Look Tuesday at Sugar Bee CraftsPrimp Your Stuff Wednesday at Primp JunktionBe Inspired at Elizabeth and CoPretty Things Link Party at twelveOeightTime to Shine at A Diamond in the StuffToo Cute Tuesday at Funky Polkadot GiraffeThe Power of Paint Party at Domestically SpeakingCreatively Tuesday at The Rustic PigShow Me What You Got at Not Just a HousewifeShare It Link Party at The Winthrop ChroniclesTasteful Tuesday at Naptime CreationsTutorial Tuesday at Hope StudiosTrash 2 Treasure at Kammy's KornerFluster's Creative Muster Party at Fluster BusterThe Creative Spark at Clean and Scentsible

Simply Creations Link Party at My Simple HomelifeFurniture Feature Friday at Miss Mustard SeedInspire Me Please Link Party at Liz Marie BlogFrugal Friday at The Shabby NestFeathered Nest Friday at French Country CottageWhat Have You Redone at Redoux InteriorsHome Sweet Home at The Charm of HomeThrifty Things Friday at The Thrifty GrooveSimple and Sweet Fridays at Rooted inThymeBe Inspired at Common GroundFaunt It Friday at Chic on a Shoestring DecoratingFrugalicious Friday at Finding FabulousFabulously Creative Friday at Jennifer RizzoShow and Tell Friday at Romantic HomeJunkin' Joe Vintage and Thrifty Finds at The Cottage MarketWeekend Wrap-Up Party at Tatertots and JelloShabbilicious Friday Link Party at Shabby Art BoutiqueTickled Pink at 504 MainAnything Blue Friday at The Dedicated House

Friday, March 8, 2013

Antique Handle Caddy


I will be the first to admit that I shamelessly stole this idea from Donna at Funky Junk Interiors. I saw it shortly after I signed up for Pinterest and fell in love. 

So last summer I began the search for an antique drill, at a very reasonable price. They are pretty easy to find, but I knew I didn't want to pay much. So... I waited. And then, I happened upon this antique hand brace during the last few hours of a barn/estate sale right outside of town. For only $2.00. Now that's my kind of price tag! :) It still has what looks like a screwdriver bit in it. 
 I immediately told Eric what I wanted him to do with it. It was not on the top of his priority list, apparently, because it just got done about a month ago. But that's ok, because it did indeed get done! He is a man of his word, even if he is slow!
Just teasing, Eric! {love ya}

I have no idea how he put it together. I didn't even bother to ask, because I was way too excited! But Donna gives an excellent tutorial on her blog at the link above.  
The timing actually couldn't have been more perfect. Right after he finished the caddy, I received my new shipment of Ce Ce Caldwell's sample size paints. And I was just itching to try them out. I picked the Traverse City Cherry because I've seen some nice things done with it and I don't usually lean towards red. But, boy, am I glad I did!
I painted the entire thing in red (it's a very beautiful red, by the way!) and then did a splotchy (that's the technical term, right?) topcoat of Virginia Chestnut. Then I distressed it and used dark aging wax over the whole thing. 
I think it looks a lot like barnwood. 
And I LOVE it! 
Hope you enjoy it too :)


Everyone loves a good party!
Check my project out along with other great inspiration, at these great blogs...

One Project at a Time at A Bowl Full of LemonsTransformation Tuesday at The Ironstone NestMonday Funday at Creatively LivingNifty Thrifty Tuesday at Coastal CharmThe Scoop at Cedar Hill RanchProject Inspired{d}at Cupcakes and CrinolineYou're Gonna Love It at Kathe with an ETransformed Tuesdays at PJH DesignsTweak It Tuesday at Cozy Little HouseTake a Look Tuesday at Sugar Bee CraftsPrimp Your Stuff Wednesday at Primp JunktionBe Inspired at Elizabeth and CoPretty Things Link Party at twelveOeightTime to Shine at A Diamond in the StuffToo Cute Tuesday at Funky Polkadot GiraffeThe Power of Paint Party at Domestically SpeakingCreatively Tuesday at The Rustic PigShow Me What You Got at Not Just a HousewifeShare It Link Party at The Winthrop ChroniclesTasteful Tuesday at Naptime CreationsTutorial Tuesday at Hope StudiosTrash 2 Treasure at Kammy's Korner


Pin It button on image hover