Showing posts with label love. Show all posts
Showing posts with label love. Show all posts
Thursday, February 12, 2015
Thursday, February 5, 2015
Monday, February 2, 2015
Friday, January 30, 2015
Thursday, January 29, 2015
Wednesday, January 28, 2015
Tuesday, January 27, 2015
Monday, January 26, 2015
Thursday, January 22, 2015
Wednesday, January 21, 2015
Monday, January 19, 2015
Monday, February 3, 2014
Love, Flowers and Romantic Artwork
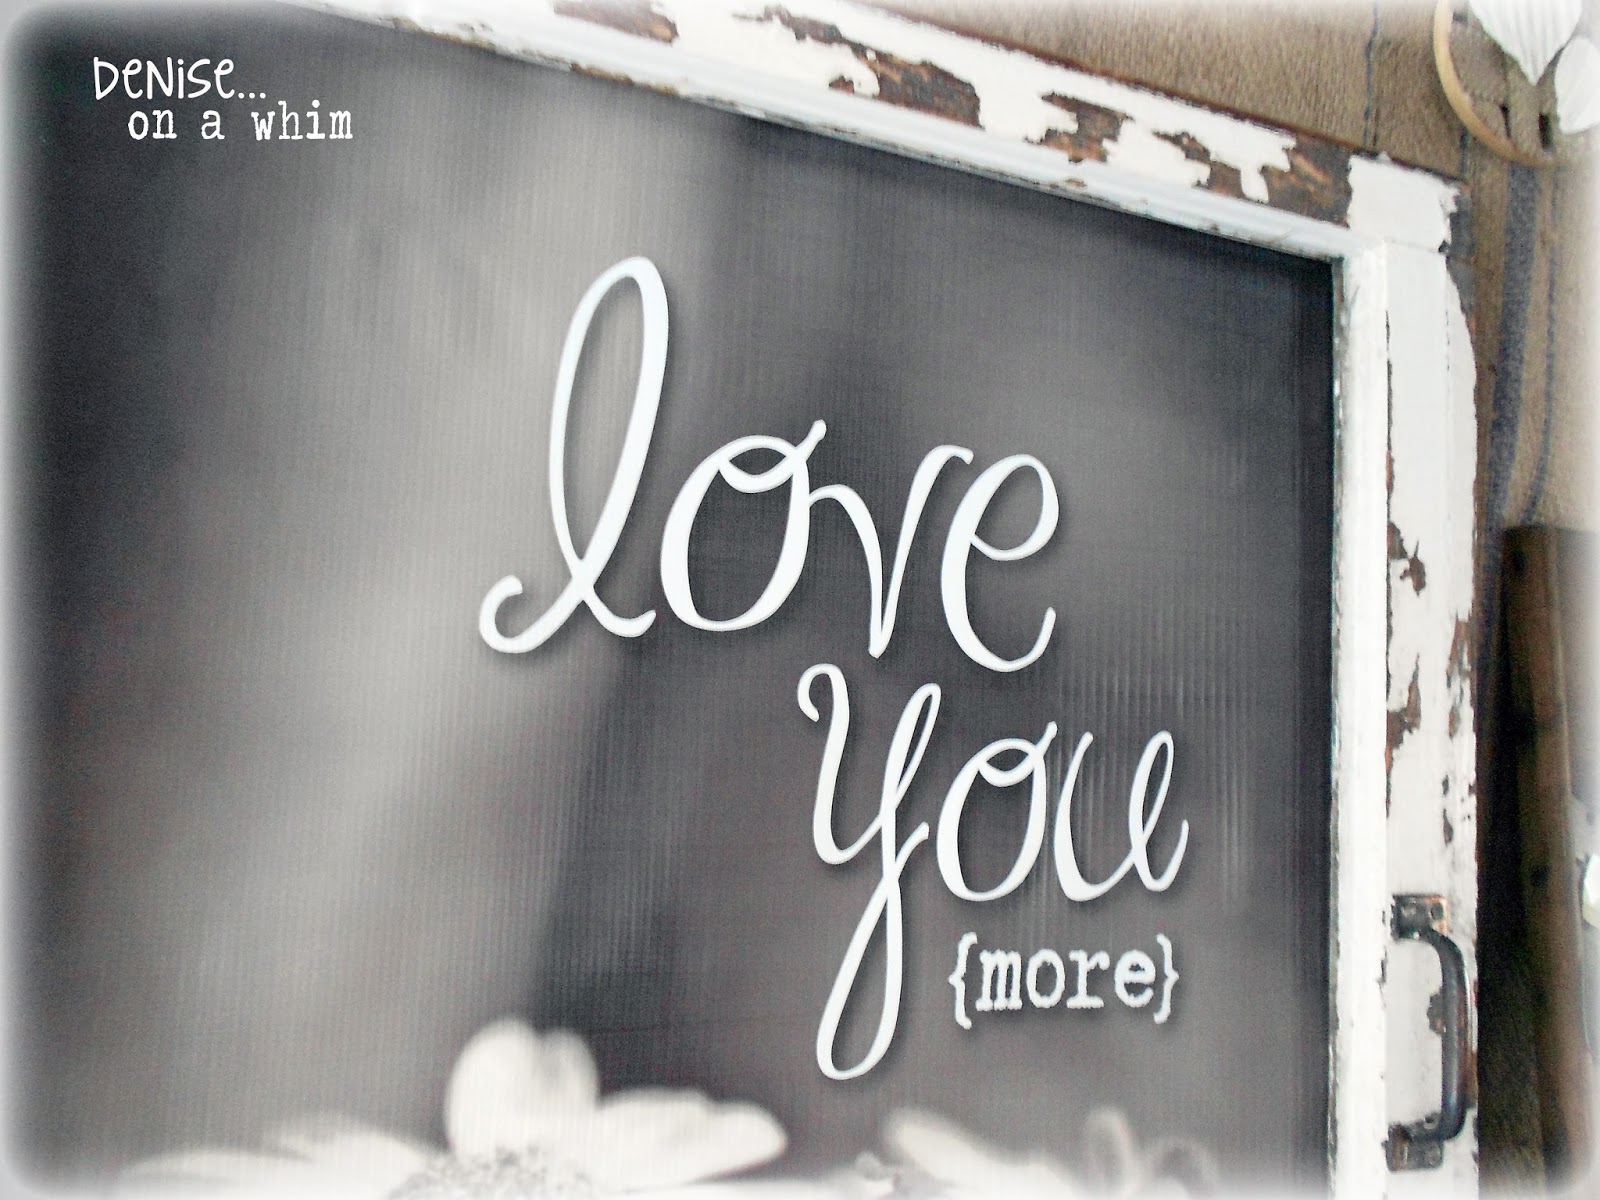
Do all couple have a thing they say to each other? You know, a little phrase that has become part of your regular conversation. For Eric and I it's, Love You More. One of us usually ends up saying it when we end a phone conversation. The funny thing is, my kids have now taken it up, too. So I hear it often. Guess that's why I created this sign.
Friday, May 17, 2013
I Guess We Make Lots of LOVE Stuff :)
I love aqua. For anything. I think this sign would look awfully cute displayed with red! I love me some teal and red!
This was just another vintage frame we purchased from an auction. With a little cleaning and a light coat of aqua paint, the details on this beauty just pop!
I usually end of taking the glass right out of the frames for most of our projects but, for this one, I decided to keep it. We simply glued some black and grey floral fabric on the backer and inserted it behind the glass. The only thing left to do was cut a white vinyl stencil and apply it to the top of the glass.
We think she turned out quite lovely! How about you...?
I would love it if you'd connect with me via bloglovin', facebook, google+, pinterest, or hometalk!
Getting new followers and comments absolutely makes my day! :)
Monday, May 13, 2013
Moms
I hope everyone had a wonderful Mother's Day yesterday.
Although I wasn't feeling very well, I spent the day with my two little munchkins and Eric's family.
We had a lovely time!
On Friday, we all went to Chris's classroom and had muffins.
Here's a pic of me and my lovelies.
I'm so proud to be the mom of 2 really special kids.
My daughter, Keara, is a wonderfully bright and beautiful girl with a kind heart.
And my son, Chris, is so funny he just about knocks my socks off sometimes!
They bring so much joy to my life that I can't even put it into words.
Above is a little sign we made that we sold at our last show.
It rings so true to what I feel being a mom is.
A little bit of this and a little bit of that,
all rolled up in a big bundle of unconditional love.
It's what I always felt from my own Mom and what I always hope my kids feel from me.
Above all else, is love.
Happy week to everyone!
Wednesday, April 24, 2013
Oh, What Love Can Do!
You may remember our Card Catalog Inpsired Table. If not, we'd love for you to check it out. But. long story short, before that was an eight-drawer table, it just a simple cubby bin. We actually flipped it sideways from what was intended to be the top in order to make the table. Well, it had this piece of wood on the top that we removed.
Now, it's this pretty little sign!
I just love making signs for our business.
What can I say...
I'm a sign maker by day so I guess it spills over into the evening as well. :) I enjoy designing pretty little signs without any restrictions put on my by the customer. These signs are all my handy work. I think that's why I enjoy them so much.
This little piece of wood was a dark color, not quite green and not quite brown. Pretty much mud! I liked the look of the wood and the way it was weathered and chipping a little on the edges. So I decided to work with the color.
I painted some Ce Ce Caldwell's Traverse City Cherry over the original color.
I immediately fell in love!
Once it was dry, I applied my vinyl stencil and began painting the love part of the lettering with Santa Fe Turquoise. I decided to use a different color on the rest because I wanted the 2nd part of the saying to stand out from the first part. So I used Johnston Daffodil on the other lettering and then on the flowers. Once dry, I simply dry-brushed some Turquoise over the Daffodil to give the flowers a softer look.
I couldn't have been happier when I took the stencil off!
This is one of my favorites :)
Hope you've enjoyed it as well!
If you haven't liked our facebook page yet, you can do that here.
And you can follow me on Pinterest with this link.
To get my new posts at bloglovin', just click this.
Getting new followers and comments absolutely makes my day! :)
Everyone loves a good party!
Check my project out along with other great inspiration, at these great blogs...
Masterpiece Monday at Boogieboard Cottage, Mop It Up Monday at I Should Be Mopping the Floor, Make the Scene Monday at Alderberry Hill, Pink Hippo Party at Pinkapotamus, Monday No Rules Blog Hop at A Sorta Fairytale,Just Something I Whipped Up at The Girl Creative, Metamorphasis Monday at Between Naps on the Porch, Making the World Cuter Monday, Before and After at Thrifty Decor Chick (first Monday of the month), What's in the Gunny Sack at the Gunny Sack, Make It Pretty Monday at The Dedicated House, Mod Mix Monday at Mod Vintage Life, Budget Decorating Party at Creative Cain Cabin, That DIY Party at DIY Showoff, The DIY'ers Link Party at Home Coming
One Project at a Time at A Bowl Full of Lemons, Transformation Tuesday at The Ironstone Nest, Monday Funday at Creatively Living, Nifty Thrifty Tuesday at Coastal Charm, The Scoop at Cedar Hill Ranch, Project Inspired{d}at Cupcakes and Crinoline, You're Gonna Love It at Kathe with an E, Transformed Tuesdays at PJH Designs, Tweak It Tuesday at Cozy Little House, Take a Look Tuesday at Sugar Bee Crafts, Primp Your Stuff Wednesday at Primp Junktion, Be Inspired at Elizabeth and Co, Pretty Things Link Party at twelveOeight, Time to Shine at A Diamond in the Stuff, Too Cute Tuesday at Funky Polkadot Giraffe, The Power of Paint Party at Domestically Speaking, Creatively Tuesday at The Rustic Pig, Show Me What You Got at Not Just a Housewife, Share It Link Party at The Winthrop Chronicles, Tasteful Tuesday at Naptime Creations, Tutorial Tuesday at Hope Studios, Trash 2 Treasure at Kammy's Korner, Fluster's Creative Muster Party at Fluster Buster, The Creative Spark at Clean and Scentsible, Tuesdays at Our Home at Our Home Away from Home, Homemade by You at Made to be a Momma, Trendy Tuesdays at Sweet Little Gals
Wildly Original Link Party at I Gotta Create, Wow Us Wednesday at Family Home and Life, Whatever Goes Wednesday at Someday Crafts, Whimsy Wednesday at Smart School House, What's It Wednesday at Ivy and Elephants, Wednesday Whatsits at White Lights on Wednesday, What We Accomplished Wednesday at Green Willow Pond, Under $100 Linky Party at Beyond the Picket Fence, Show and Share at Southern Lovely, Wow Us Wednesdays at Savvy Southern Style, Wow Me Wednesday at Gingersnap Crafts, From Dream to Reality at The DIY Dreamer, Its' a Party! at A Creative Princess, Show Off Your Stuff Party at Fireflies and Jellybeans, Look What I Made Wednesday at Creations by Kara, Create and Share at The Trendy Treehouse, A Little Bird Told Me Link Party at The Life of Jennifer Dawn, Oh What a Happy Day Link Party at Not Done Growing
Party Time at The 36th Avenue, Home Sweet Home at The Charm of Home, Transformation Thursday at The Shabby Creek Cottage, Share Your Cup Party at Have a Daily Cup of Mrs. Olson, Hookin' Up with HOH at House of Hepworths, Talkin' about Thursday at Designed Decor, Live Laugh Linky at Live Laugh Rowe, Home and Garden Thursday at A Delightsome Life, The Inspiration Gallery at Craftberry Bush, Made U Look Linky at Made in a Day, Creative Things Thursday at The Vintage Farmhouse, Catch as Catch Can at My Repurposed Life, Time Travel Thursday at The Brambleberry Cottage, Catch a Glimpse Party at A Glimpse Inside, 52 Mantels, Creative Inspirations Linky Party at Embracing Change, Simply Create Link Party at Redfly Creations
Simply Creations Link Party at My Simple Homelife, Furniture Feature Friday at Miss Mustard Seed, Inspire Me Please Link Party at Liz Marie Blog, Frugal Friday at The Shabby Nest, Feathered Nest Friday at French Country Cottage, What Have You Redone at Redoux Interiors, Home Sweet Home at The Charm of Home, Thrifty Things Friday at The Thrifty Groove, Simple and Sweet Fridays at Rooted inThyme, Be Inspired at Common Ground, Faunt It Friday at Chic on a Shoestring Decorating, Frugalicious Friday at Finding Fabulous, Fabulously Creative Friday at Jennifer Rizzo, Show and Tell Friday at Romantic Home, Junkin' Joe Vintage and Thrifty Finds at The Cottage Market, Weekend Wrap-Up Party at Tatertots and Jello, Shabbilicious Friday Link Party at Shabby Art Boutique, Tickled Pink at 504 Main, Anything Blue Friday at The Dedicated House, Rustic Restorations Weekend Link Party at Homespun Happenings, Great Idea Thursdays at A Handful of Everything
Saturday Show and Tell at Cheerios and Lattes, Saturday Nite Special at Funky Junk Interiors, A Bouquet of Talent Party at Life on Lakeshore Drive, Strut Your Stuff Party at Six Sisters' Stuff, Show and Tell Saturday at Sassy little Lady, Get Schooled Satuday at Too Much Time on My Hands, Power of Pinterest Party at Fox Hollow Cottage, Your Great Idea Party at Or So She Says, Overflowing with Creativity party at It's Overflowing, Craft Country Cottage Party at Old Red Barn, Saturday SHOW-licious Craft Showcase at Sew-licious
The Sunday Showcase Party at Under the Table and Dreaming, Sunny Simple Sundays Party at Sunny Simple Life, Sundae Scoop at I Heart Naptime, Think Pink Sundays at Flamingo Toes, Nifty Thrifty Sunday at Nifty Thrifty Things, It's Party Time at Three Mango Seeds, Restyled Sundays at Stylish Once Again, Silver Pennies Sundays at Silver Pennies, Frugal Crafty Home Blog Hop at A Blossoming Life
Labels:
aqua,
art,
CeCe Caldwell Paints,
chalk paint,
decor,
DIY,
flowers,
Johnston Daffodil,
love,
paint,
pallet,
recycled,
repurposed,
rustic,
Santa Fe Turquoise,
signs,
teal,
Traverse City Cherry,
weathered,
wood
Tuesday, February 19, 2013
HeartPrints Keychain {for my love}
Buying gifts for a man can sometimes be way-difficult! Making them is sometimes even more of a challenge because, let's face it, I'm a girl and I like pretty things. It's sometimes difficult to not get too carried away with the cutesy and lean more toward the manly. But, I thought I'd give it another try after my
to Eric turned out so well!
I saw this really great pendant made from clay on Pinterest. It was so cool (here's the link to her post), but I knew I wouldn't have a chance to make it to the store for any clay. So, what's a girl to do...?
Get creative, of course!
I pulled out what I had at home, namely a few washers at different sizes and a tin can lid. I figured I would put my fingerprints on the can lid and then cut a heart around them. What I wasn't sure of, was what to use for the medium to transpose my fingerprints on.
I tried using fingernail polish painted on the metal, which worked (although it was a little messy for my fingers! lol) until I tried to cut the heart out, at which time it chipped off the tin. Hmmm.... what to try next?
Then I had a lightbulb moment. Chalk paint would work on the tin! So I painted one coat of Aubusson Blue on and then, over that, I used Old White and quickly made the fingerprints. It worked so well, showing off the blue where my prints were. Yay! So I put a coat of wax on the lid, then got the tin snips out and cut a heart around the 2 fingerprints.
The next thing to do was get out my drill and add a hole in the large washer so I could make this thing into a keychain. To be honest, I wasn't really sure if the bits I had were supposed to be used on metal, but I figured I'd give it a try. And it did indeed work. Another success! :)
I next got out my trusty JB Weld, attaching the 2 washers and the heart together and clamped it for a few hours. Things seemed to be going smashingly! But something was missing. It just didn't seem finished. So I grabbed a bottled cap to see if that would work somehow. Perfect fit for the back of the washer! I painted it with Chalk Paint as well, this time in Coco, and waxed it with dark aging wax. But it still needed something more...
I had though once about using metal stamps on this piece. But, they are really kind of a pain! lol. Instead, I printed out some words on plain paper, cut them out and used Mod Podge to attach them to the bottlecap and again over them to seal it.
I put a nut between the washer and the bottle cap and used the epoxy to weld those together too. Finally, I added some dark wire through the hole I had drilled and an old spring I had found when scrounging through my box of junk. I bent the wire back into the spring and used a little more JB Weld to hold it. Then I added a ring and it was done.
I was really happy with the way it turned out. Junky and totally repurposed. A bit manly (but still pretty!). All with a personal, unique-to-me touch. The perfect Valentine for my guy. And he thought so too :)
We're sharing at these great parties...
Nifty Thrifty Tuesday at Coastal Charm
Creatively Tuesday at The Rustic Pig
Tweak It Tuesday at Cozy Little House
Pretty Things Party at twelveOeight
Creatively Tuesday at The Rustic Pig
Tweak It Tuesday at Cozy Little House
Pretty Things Party at twelveOeight
Cowgirl Up! Party
Your Gonna Love It Linky Party at Kathe With an E
Transformed Tuesdays at PJH Designs
Take A Look Tuesday at Sugarbee Crafts
Be Inspired Linky Party at Elizabeth and Co
It's Party Time at Three Mango Seeds
From Dream to Reality at The DIY Dreamer
Wow Me Wednesday at Ginger Snap Crafts
Whimsy Wednesday at Smart School House
Tasteful Tuesday at Nap Time Creations
What We Accomplished Wednesday at Green Willow Pond
Show and Share with Southern Lovely
Wow Us Wednesday at Savvy Southern Style
Wednesday Whatsits at White Lights on Wednesday
Show Me What Ya Got at Not Just a Housewife
Under $100 Linky Party at Beyond the Picket Fence
Live Laugh Linky at Live Laugh Rowe
Home and Garden Thursday at A Delightsome Life
Made U Look Linky at Made In a Day
Transformation Thursday at The Shabby Creek Cottage
Hookin Up with HOH at House of Hepworths
Labels:
Aubusson Blue,
chalk paint,
coco,
DIY,
hardware,
hearts,
industrial,
junk,
love,
manly,
metal,
Mod Podge,
old white,
repurposed,
rustic
Thursday, February 14, 2013
feeling the love
We sure are feeling the love over here
on Valentines Day!
Eric and I are so excited about being featured this week. Not only once, but 3 times!
I Love That Junk
Thanks so very much for the features <3
If you missed the post that got featured, here it is...
And happy, happy Valentines Day to you all!
Thursday, February 7, 2013
Jar of Hearts
I was home last Friday with a sick kid. And I'm talking really sick! He eventually had to take a rest, so I decided to work on a quick, little project while he slept.
I grabbed a jar I had already painted with Old White Annie Sloan Chalk Paint™, my box of ribbon and my mom's old tin of buttons, and set out to make something or another.
I knew I wanted to do something with a heart on it, but wasn't sure what I wanted to make the heart out of. I looked around my supplies and found the perfect material: some thin scraps of corkboard. I cut the heart out of the cork, freehand, and then painted the edges with Primer Red ASCP™ to give it a little more definition.
I picked out a red gingham ribbon and glued it to the jar, then added some twine. Next I glued the cork heart over the ribbon, adding a cute pink button in the center. :)
When I went to take some pictures of my project, I realized I needed to put something in the jar for the photo shoot. Well, I didn't really have anything laying around. So, I quickly got out some skewers and broke them off to make them different lengths. Then I grabbed some red scrapbook paper with pink stripes and cut some hearts out of it, freehand again. I taped them to the skewers, inserted them into the jar with a little bit of paper for filler and then, suddenly, my little heart jar became a Jar of Hearts.(I just so happen to be a BIG Christina Perri fan, by the way!)
Sharing this craft at...

Labels:
chalk paint,
decor,
DIY,
hearts,
love,
organizing,
paint,
recycled,
repurposed,
rustic,
upcycled,
valentine,
vase,
white
Tuesday, February 5, 2013
Valentine Picture Frame DIY
I picked up this folding picture frame at the local thrift store. It had a very light stain on it. It didn't look very interesting, that's for sure. But I have one like it at home, in a dark stain, and I use it. So I figured, why not...
I was just going to paint the frame and call it good. Give it a fresh color and move on. But I was monkeying around with a few layouts one day and I decided to see what something would look like. And thought I'd give it a try.
I first removed all the glass and painted the frame and waxed it. I then cut some leftover canvas material that I had laying around to fit the picture areas and painted them in Annie Sloan Chalk Paint™ (Primer Red). I really like the way the chalk paint looks on this particular canvas, which is actually banner material. When painted, the back has a great texture!
The trickiest part of the project was getting the layout to work with the Coco heart on 4 separate pieces. Measuring between each panel so I would be sure to get the heart to line up, I laid the design out and cut my stencil. I applied those and painted the hearts and lettering. I used Coco and Old White Chalk Paint™ and also some pink acrylic that I had on hand.
The only thing left to do was assemble the pieces back into the frame. I kept the glass out of the 4 left sections but put them back in the last section. (I cut out some cute magazine pics and inserted those for the photos. Figured that was easier than cutting up pics of my own kids!)
And the project was done. Cute, if I do say so myself. I'm beginning to wonder why I didn't just use pics of my own kids in there. That could be my excuse for keeping this little treasure! :)
Tuesday, January 29, 2013
Love Was Made for You and Me
A Simple DIY Project from 2x4 Scraps
I just love using 2x4 pieces to make cute, easy decor. Maybe it's because we always seem to have scraps laying around. I mean, if you're going to reuse and repurpose as the basis for your business, why waste perfectly good wood scraps? :)
Before Christmas, we made the cutest little Pinterest-inspired snowmen out of 2x4 scraps. So, when I started working on some Valentine projects, I thought why not do something similar.
This is what I came up with...
The hardest part of this project is getting the wood cut to the size you need. (I don't have a saw, so that's why this step is so difficult for me. lol) Thankfully, Eric can do this for me; unfortunately, he can't always do it as quickly as I'd like. Or, better put, I can't always get the cut pieces from him as soon as I'd like. Being in 2 different towns can often be a bit of a challenge. And I'm not really great with the patience thing sometimes. I mean, when I have a good idea in my head, especially one that I know is not going to take me long to put together, I just want to get it done so I can see the finished product! I'm not so good at waiting. :)
But, once the cut pieces were in my hot little hands, all I needed to do was first paint the base coat. I used Annie Sloan Chalk Paint™ for the white blocks but didn't have enough Primer Red for the bottom. So for that I just used plain old acrylic paint in red. I let it dry, which doesn't take long on a bare piece of wood. I purposefully didn't put a thick coat on because I wanted these to be a little rustic.
Next I applied my stencil. There are many options for getting the lettering on, but I prefer this method because I can cut any stencil I need out of vinyl. I applied a coat of paint in the reverse colors of the blocks and let it dry. I then put a thin coat of dark stain over the red because I thought it would richen up the color I had used. Really glad I did that last step because I love how that turned out. :)
The only thing left was to glue to the letter pieces onto the bottom block. I used Elmer's Wood Glue and clamps and let it sit over night.
And there you have it! Another quick Valentine project that you can customize however you'd like. :)
I'm sharing this fun craft at...
Subscribe to:
Posts (Atom)


.jpg)


